For this milestone I looked at cleaning and documenting the Regradable VFX that aligned with a Character Technical Artist. I decided to focus mainly on the VFX that targeted Eli, our main character, directly in one post. This would mainly focus on the:
Eye shader
Glitch damage VFX
Sludge VFX
Eye Shader
Example of Eli's emotion changing with the animations
Debug version of how Eli's eyes work, it uses a face texture that moves up and down to dictate which emotion to display
Rendering for Artstation thumbnail, it ended up taking a Fortnite aesthetic, rendered in Marmoset Toolbag
Glitch Shader
This and the Eye Shader were the two largest shaders I worked on. This one was specifically meant to be used in instances of our character being damaged, and it overlays 5 different visual systems overtop of one another, including noise, glitch lines, chromatic aberration, pixelization, and a hue, saturation, & brightness adjustment.
These systems can be mixed-and-matched or used all together in specific material instances as the designers see fit.
Poison Overlay Shader
This shader was a late addition and basically is used to show some effect is being put on Eli as he walks through the sludge in the levels. Its relatively simple, however it uses a special trick for the gradient so that regardless of the world position Eli is at, the gradient always maintains it's percentage without relying on uvs.
This sprint I spent a majority of my time working on secondary character art needs such as working out the workflow for Sol's hair, breaking down Metahumans for their parts, and designing the first proxy of the Yarn Ball character.
Hair Research
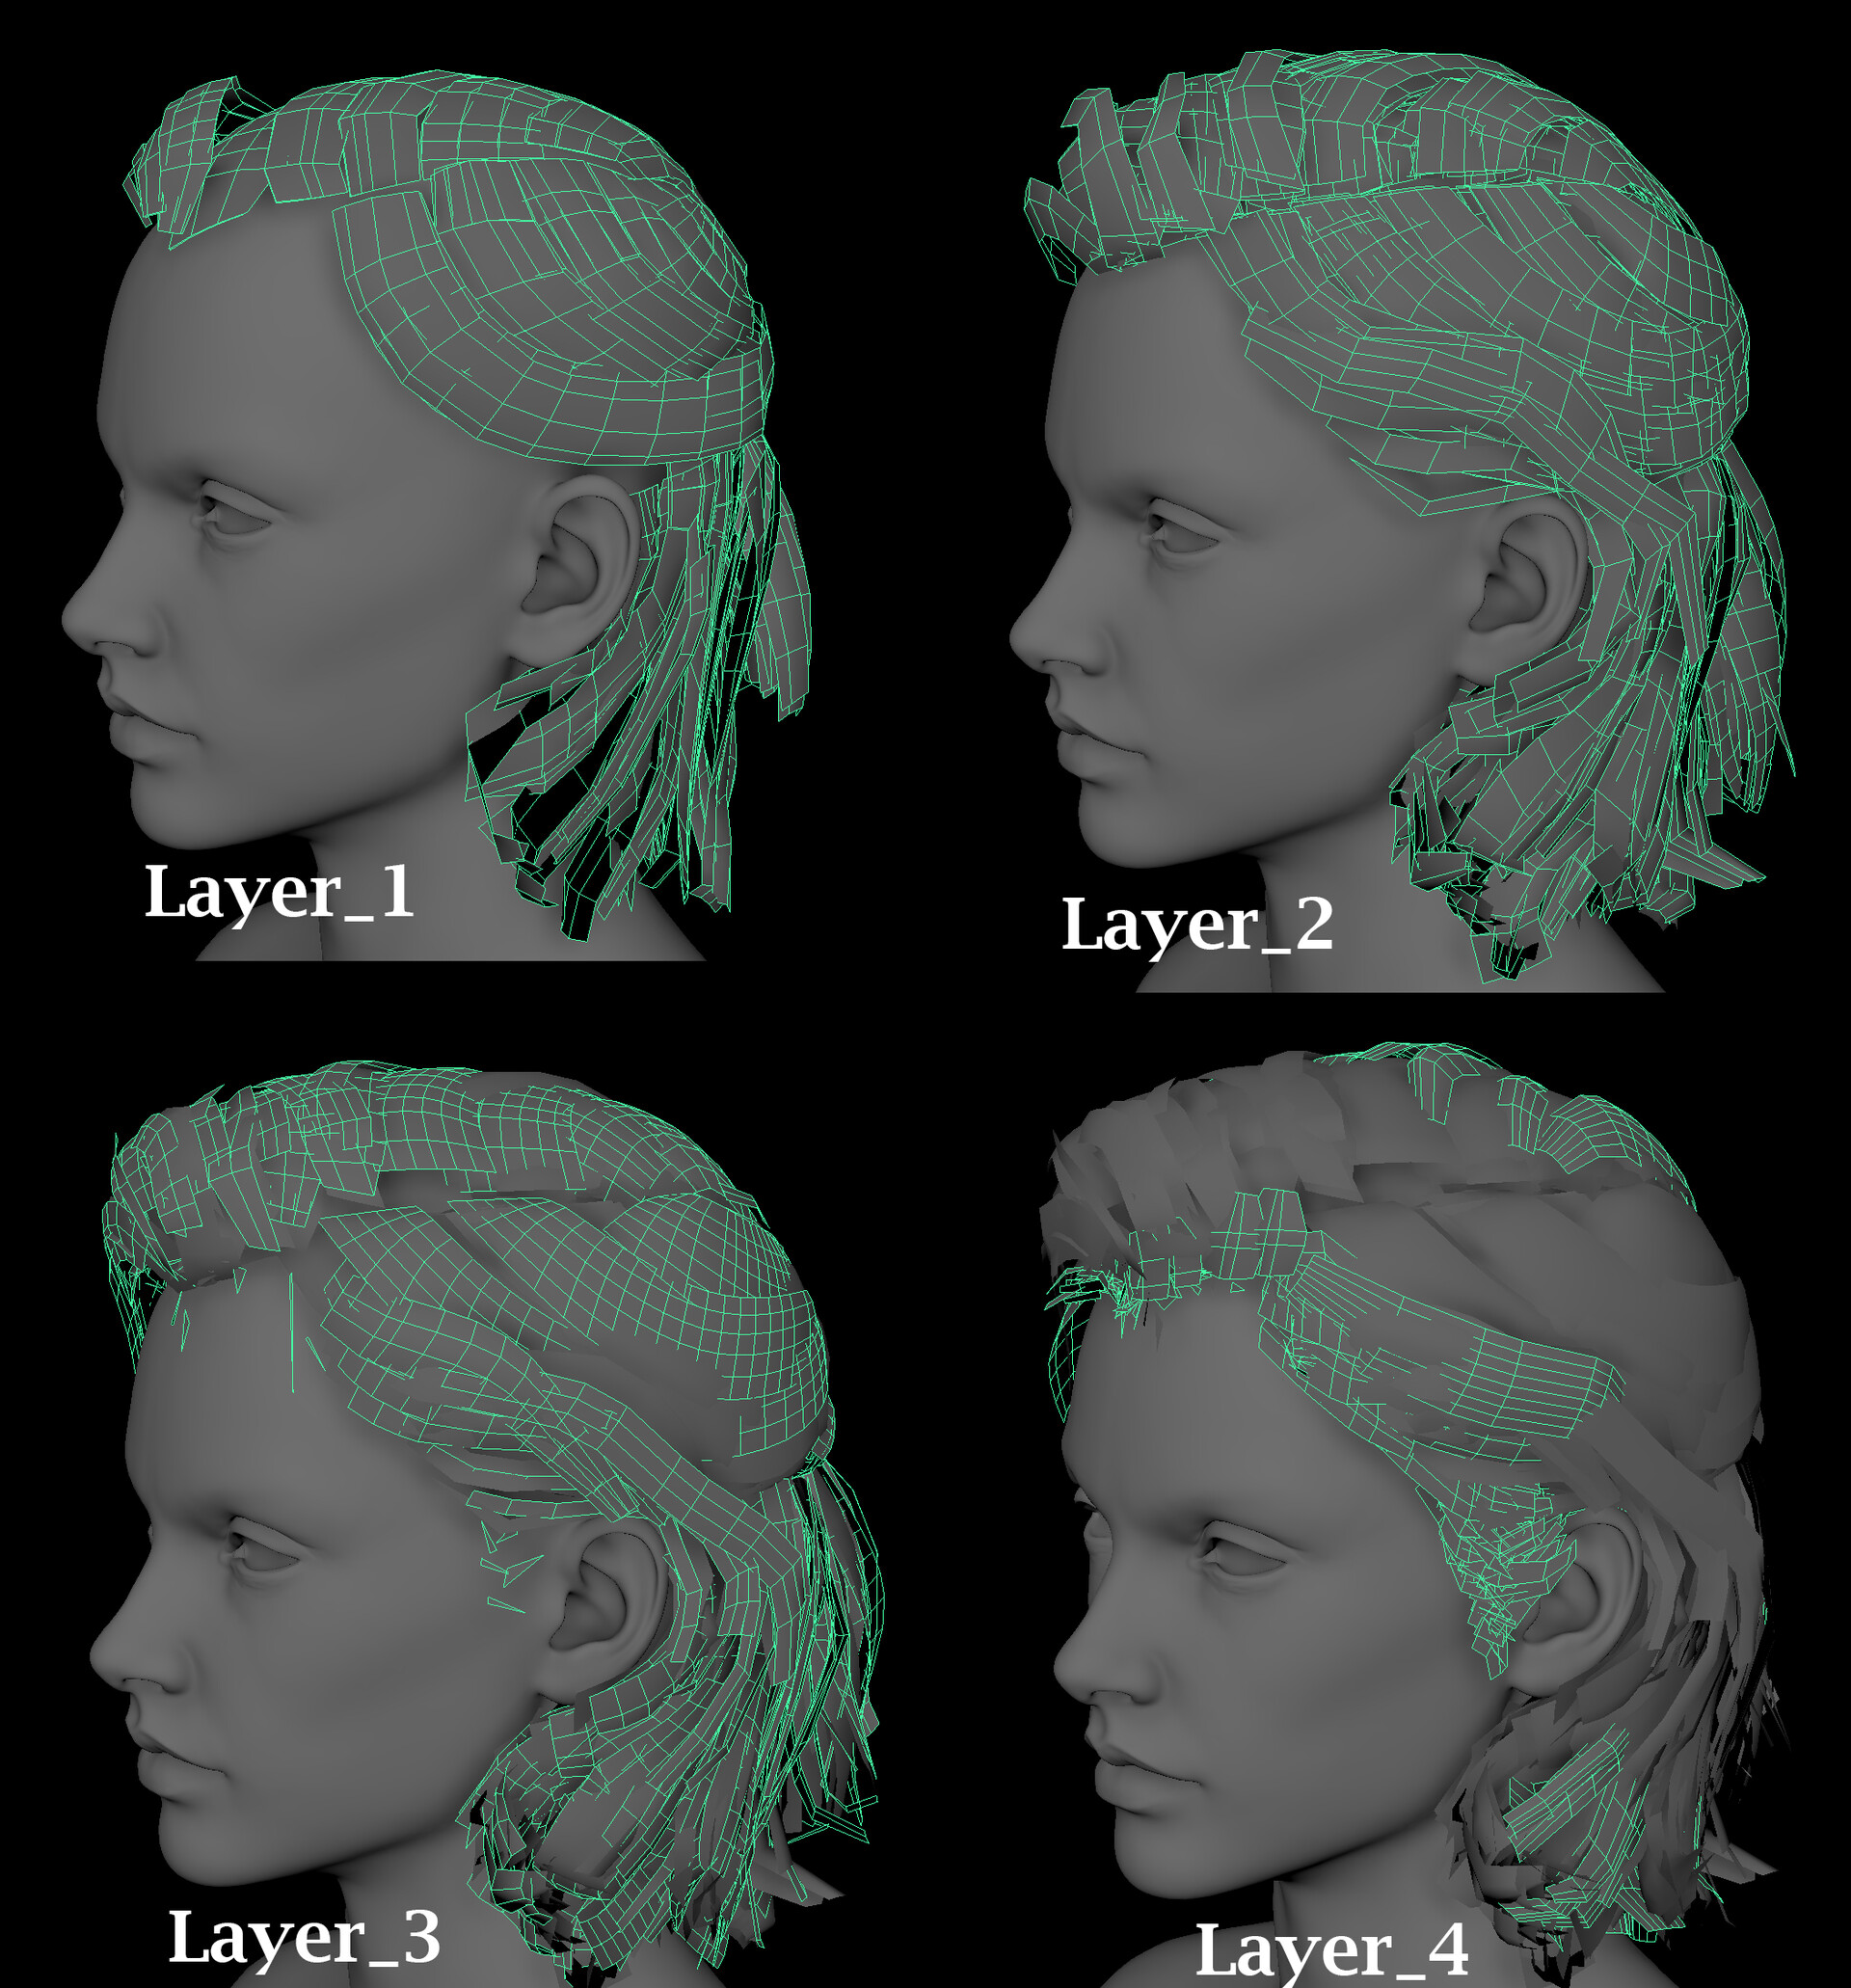
For our style, I spent some time looking at In the Valley of Gods, specifically with their character Zora, on how they do hair. This turns out to be a multi-layered approach with a basic mesh and hair cards stacked ontop of them
For this, Ive been testing out both Ahoge and GC Curves as Maya Plugins to see what the best way to get the volume we need for a coiled hair texture. This process started with a mesh volume, then converting that into a random number of curves with Ahoge. Then processing those curves into either cards or tubes to be textured.
Currently Im working with Fibershop to make proper hair alphas/curls, however I need more time with the program to create the effect I really need.
For the Barista, I took one of my Metahumans from a personal project, extracted the face, hands and hair at their lowest subdivision, and reconnected them in Maya. Alongside this fixing other notes that Jocelyn and Jordyn had for me.
Metahuman head raw.
The yarn has been tricky from the start since there are not many good references for how a yarn character should look. I did my best to create a rounded cube and then extrude out segments wrapping around to create individual strings. I used a material in Zbrush to see how a similar shader to the one we're making would affect it.
The project for this week focuses on how to make grooms utilizing Houdini for hair generation. I utilized my concept for Purah's third form, the Primal Shoosuva as a reference to create a basic head sculpt, minus the horns, and went through two seperate tutorials to learn the rough process.
Key art of Purah's third form, the Primal Shoosuva
Process Images
Left to right: Hair placement painting, length of hair painting, hair + curve combination
curves only, hair only
Base Sculpt
I used Arvid Schneider's 'How to Groom Hair & Fur in Houdini' tutorial for the majority of this process, going through the basics so I could run my own experiments and play with the different tool settings. For this part of the process, I didn't put much focus on the realism/reference of Smilodon's hair, but rather on understanding the process and what goes into making hair generation content. A real, "Make it exist first" workflow
This project was inspired by AVASCOT's Groom Shader as a base, specifically its ability to make realistic blends of hair throughout the same coat utilizing masks. Although this wasnt utilized in this portion of the experiment, I'll be making revisions in favor of this plugin.
Reference Board
Debugging
I knew this would be part of the process and something to keep in mind, but I find it really interesting. that you are still able to see tiny amounts of the skin through the fur. While looking through other hair card references for humans, I came upon this diagram from Mountain Dog Studios of their real-time hair breakdowns. If I am able to spawn hair within small areas and have the system react accordingly, I think this would help give more control and a fuller volume to the groom.
One of the biggest problems with this groom so far has been the inclusion of hair where I don't intend on it. This has been especially noticeable in the mouth with lots of hair growing into the lips. Even if the hair isnt long, the small dots don't disappear with adjustments to the base fur map.
For this assignment I wanted to play with an early morning lighting sequence. Since I've been listening to more and more country music, the image of soft warm lighting and rays of morning light has been stuck in my head. This project was enjoyable, if anything a bit challenging to compose together, as I couldn't figure out to enable the subsurface scattering that really makes foliage pop. Instead I had to lean on warming the light and tinting it ever so slightly more purple.
Environmental Character
( Lit / Detail Lighting / Lighting Only)
Three Point Lighting
( Lit / Detail Lighting / RGB Detail Lighting)
Default Lighting
Straight out of the box of the environmental mixer / No Post Process Volume
A big part of our game's environment revolves around the crushing ecosystem of brutalist-styled buildings surrounding us. To avoid having our Level Designers and Environment Artist working overtime polishing pixels, I started looking into different ways we could procedurally make the buildings and slot in our different modular kit pieces in a way that was both: easy and fast.
Reference Images
A sketch detailing the concept of breaking buildings up on a grid system in the three primary axis with different pieces that can be slotted in.
For this project I ended up looking a lot at SideFX's Project Titan tutorials since they developed a plugin specifically for this purpose. However I found that through all the provided literature/documentation, a step very early on in the process is often overlooked/missed. This is most likely due to an update later without updating the resource content.
The best resource I had on this experiment was the Project Titan tutorial file which allowed me to poke through how each option works. However, the two biggest take-aways from this file was the complex nature of the architecture being generated and the in-engine designs being made.
To align our style with brutalist architecture, the ornate style of the tutorial style is not necessary. Rather we will be focused on specifically blocky architecture, as such the beta version of this tool is primarily focused on singular rectangular architecture, with notes to expand in future iterations
Another aspect was the fact that all of the geometry being entered was focused on geometry being made in Unreal rather than an external program like Maya or Blender, this required 'normalizing' the input files and ensuring, regardless of input and size, that the files work together.
A complex version of the building generator.
The main problem of this complex version is in regards to optimization. The way the primary blockout is made relies on overlapping the two cubes rather than merging them together by the vertex. A big part of this generator is to allow the Level Designers to make buildings that best fit their need. If I have to provide base shapes for them to use, it is more restrictive than necessary. This causes the generator to create wall geometry in the inside faces which is unecessary.