The project for this week focuses on how to make grooms utilizing Houdini for hair generation. I utilized my concept for Purah's third form, the Primal Shoosuva as a reference to create a basic head sculpt, minus the horns, and went through two seperate tutorials to learn the rough process.
Key art of Purah's third form, the Primal Shoosuva
Process Images
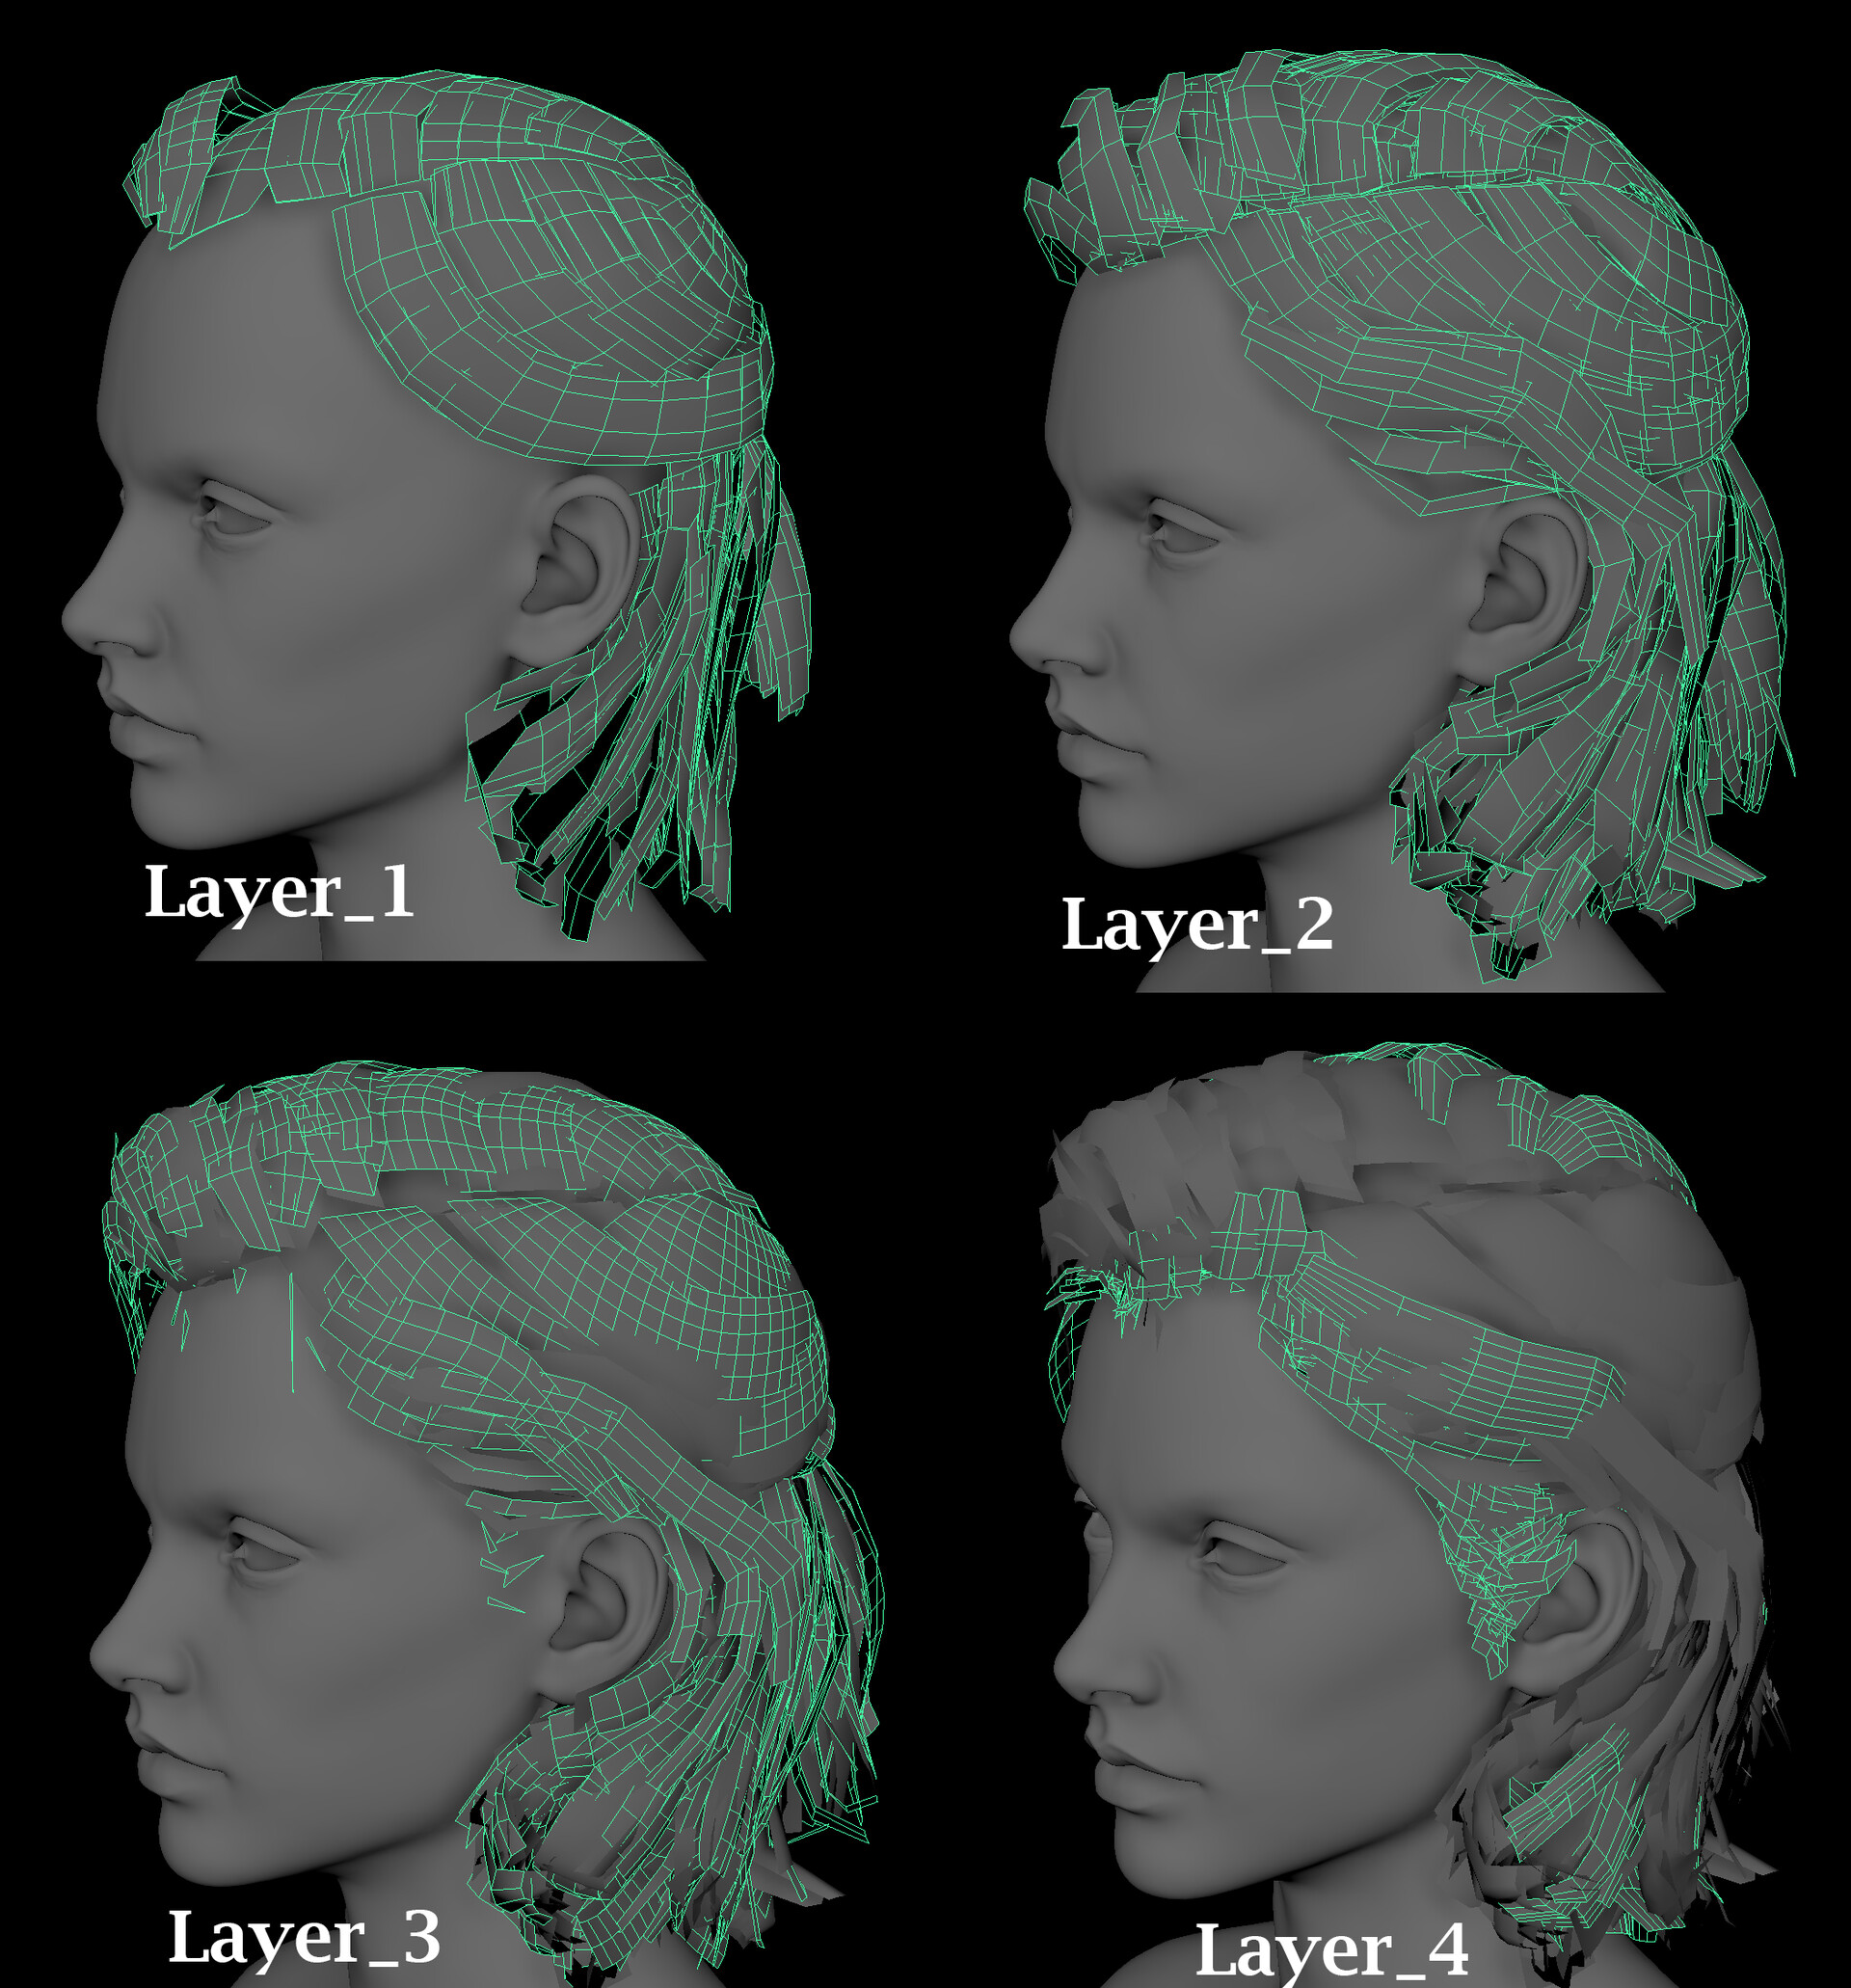
Left to right: Hair placement painting, length of hair painting, hair + curve combination
curves only, hair only
Base Sculpt
I used Arvid Schneider's 'How to Groom Hair & Fur in Houdini' tutorial for the majority of this process, going through the basics so I could run my own experiments and play with the different tool settings. For this part of the process, I didn't put much focus on the realism/reference of Smilodon's hair, but rather on understanding the process and what goes into making hair generation content. A real, "Make it exist first" workflow
This project was inspired by AVASCOT's Groom Shader as a base, specifically its ability to make realistic blends of hair throughout the same coat utilizing masks. Although this wasnt utilized in this portion of the experiment, I'll be making revisions in favor of this plugin.
Reference Board
Debugging
I knew this would be part of the process and something to keep in mind, but I find it really interesting. that you are still able to see tiny amounts of the skin through the fur. While looking through other hair card references for humans, I came upon this diagram from Mountain Dog Studios of their real-time hair breakdowns. If I am able to spawn hair within small areas and have the system react accordingly, I think this would help give more control and a fuller volume to the groom.
One of the biggest problems with this groom so far has been the inclusion of hair where I don't intend on it. This has been especially noticeable in the mouth with lots of hair growing into the lips. Even if the hair isnt long, the small dots don't disappear with adjustments to the base fur map.
Over the break I got a chance to speak with Zuccarello about printing some sculpts in the 3D print lab; as a result, I wanted to make a memento to test this out. In light of my Icewind Dale Dungeons & Dragons campaign going on a 3-week hiatus over break, it became the object of my obsession.
I decided to sculpt my favorite villain and an enemy we were currently in the middle of fighting: Kakx. A Vampiric Gnoll (humanistic hyena) who had been terrorizing the party since the start of the campaign. He became a form of mirror for my character Purah and a beloved character of mine.
Character Summary:
Tekeli-li was a gnoll vampire, and a former Fang of Yeenoghu that lurked in Icewind Dale during the 14th and 15th centuries DR. Tekeli-li was once a mortal gnoll, who led his pack across the frozen lands of Icewind Dale. In the Year of the Striking Falcon, the local Reghedmen barbarians routed the pack, forcing them to flee across the Reghed Glacier. To ensure their survival, the pack sacrificed themselves one by one to their Fang Tekeli-li, granting him sustenance to live through the winter. To the goddess Auril, Tekeli-li's ravenous hunger represented the unending "consumption" of winter. Auril interred the vampiric gnoll within the Caves of Hunger, imprisoning him in the ice of the Reghed Glacier as the passageway out froze over. He remained trapped there for over a century until a group of adventurers re-opened the passageway.
WIP sculpt before critique.
He suffers in this example from being too wolf-like, as I was still figuring out the correct mix of fur and flesh to give the illusion that fur was not just dotted over patches of skin.
I looked a lot at the work of Chloe Worthy who is known for turning video game characters into different animals, her most popular series being Red Dead Redemption
This was also a very interesting project, as one of my mentees was going through a similar struggle of finalizing their Modeling 2 project at the same time, which also happened to be a wolf/human bust and utilized a lot of the same resources as me when it came to fur texturing
A big resource I relied on a lot in this process was the combination of dynameshing and zremeshing the fur into the main body to achieve a seamless look. This tip by Mark Lambert was a literal game changer.
I really don't think this project would have gotten done without some fantastic critique from my buddy Caden, who helped me block out many of the problem areas of the face I was struggling with and narrowed it down to a misunderstanding of how the planes of the face operated.
One of the other challenges of this project was based around how little art/official reference there was for this character. Due to the nature of D&D, my version of Kakx is entirely different from someone else playing the same campaign. In the official books - his name isnt even Kakx, but Tekeli-li, where he shows up at the end of the adventure for his one appearance rather than the villian-of-the-week style battles we get with him. Big shoutout to April Prime for his key and concept art
These are all the official art appearances he has
Reference/inspo board
I would also like to shout out David Blanco and Ali Sadeghi for their awesome teeth IMM brushes, because the teeth are on full display. I really wanted to make sure they were somewhat accurate, but due to the reference images, it was hard to wrap my head around the size and shape of his teeth
Printing
Finally the time has come to print Kakx, I used Lychee Slicer to prep. This step actually took a couple revisions as I learned more of the complexity that goes into setting up supports. Big shoutout to Zuccarello and this video by VogMan
The final print time ended up being 10 hours and 59 minutes for both models.
I actually ended up printing two copies, one for myself and one to give as a gift; however, the second copy had a notably large slice taken out of his left side right below his ear. Originally I thought it might have been some sort of support error, but there is no support that connects right there.
Additionally, there seemed to be some form of orange particles that stuck in the creases of his head. The majority of it could be removed with a simple toothbrush, so it was not from the resin vat, but I couldn't find a cause for it.
A big part of our game's environment revolves around the crushing ecosystem of brutalist-styled buildings surrounding us. To avoid having our Level Designers and Environment Artist working overtime polishing pixels, I started looking into different ways we could procedurally make the buildings and slot in our different modular kit pieces in a way that was both: easy and fast.
Reference Images
A sketch detailing the concept of breaking buildings up on a grid system in the three primary axis with different pieces that can be slotted in.
For this project I ended up looking a lot at SideFX's Project Titan tutorials since they developed a plugin specifically for this purpose. However I found that through all the provided literature/documentation, a step very early on in the process is often overlooked/missed. This is most likely due to an update later without updating the resource content.
The best resource I had on this experiment was the Project Titan tutorial file which allowed me to poke through how each option works. However, the two biggest take-aways from this file was the complex nature of the architecture being generated and the in-engine designs being made.
To align our style with brutalist architecture, the ornate style of the tutorial style is not necessary. Rather we will be focused on specifically blocky architecture, as such the beta version of this tool is primarily focused on singular rectangular architecture, with notes to expand in future iterations
Another aspect was the fact that all of the geometry being entered was focused on geometry being made in Unreal rather than an external program like Maya or Blender, this required 'normalizing' the input files and ensuring, regardless of input and size, that the files work together.
A complex version of the building generator.
The main problem of this complex version is in regards to optimization. The way the primary blockout is made relies on overlapping the two cubes rather than merging them together by the vertex. A big part of this generator is to allow the Level Designers to make buildings that best fit their need. If I have to provide base shapes for them to use, it is more restrictive than necessary. This causes the generator to create wall geometry in the inside faces which is unecessary.
This project was brought on by one of my best friends who does Vtuber streaming, Kudamahou, sharing some of the aspects of her model, specifically the model's base PRISM Customizable Vtuber Model, which requires the use of numeric sliders to dictate the colour as opposed to a colour picker/limited colour selection. She shared how this can cause trouble colour matching when elements are similar and voices wanting some form of solution.
As a result I decided to experiment with how to make a small tool to resolve this, something to take the vector 3 value (RGB) with a colour picker and turn this into a numerical value that Kuda could easily use to fill in the model data.
I wanted to start off small on this project, since Kuda has a relatively complex model, I needed to build my way up to where she is, even if the math is arguably simpler. For this I grabbed a testing model by MOCHIPU Shop - 無料】絵描きLive2Dモデル - which relies on an RGB based system, but lacks a colour picker, to mess with.
The Art Meshes are the different aspects of the body, seperated into different groups, for example ArtMesh41 is the white highlights of the right eye - remember kids naming your files properly is important.
For the purposes of experimenting, im playing with ArtMesh41 which is the back pillow - you can see here we have a more complex, but better user experience selector - ideally this would be what I want Kuda to have, at a minimum the hex code in addition to the HSV sliders.
For my first attempt I was able to get the API to recognize my VS code with the mandatory information needed, this step was surprisingly easy to work through, but I can imaging going out-of VS code may have harder problems waiting for me.
This is the current state of the colour picker, bringing up a basic python menu labeled 'Kuda Colour Picker' with a singular button for 'Pick Colour' this then brings the user to a 'Select Colour' which is the ideal UI at the moment. If this could connect into the VTube Studio API I would consider this step in the process complete.
Troubleshooting
One of the bigger problems with this project is my lack of familiarity with a lot of the python-specific tools. This will be something that fades with time as I get more used to the material and get experience building other tools, however at the current moment its been really difficult to figure out some of the more niche problems - such as what is the entire range of UI I can do with python, when a lot of options are behind plugins or paywalls.
In hindsight, maybe this as my first Houdini project was not a great idea. But then again, I've never been one for good ideas or healthy work mentalities.
Faced with the understanding that I had an incredible amount of R&D waiting to grab me over break as I tried to enjoy my break in peace, I decided to lean into the workaholic lifestyle and shape my Technical Art final to break some of those topics down. The biggest curiosity for me was how we could implment limited artists to make assets as fast as possible without losing quality or artists sanity.
As such, proceduralism and Houdini's open arms took hold. I decided to go with a procedural vine tool since it has the most potential to be used in the levels and covers areas that Speed Tree cannot, aka fitting vines to custom meshes.
An example of Parameters available in the system. I wanted to provide as much possibility for optimization support as that is a big concern of my team for the inclusion of foliage and city environments, these settings would allow for a range of polygong counts on the assets utilizing this tool. I also included some lesser-utilized tools, such as 'Growth', which will essentially dictate how much the foliage has grown up the asset, incase there needed to be tweaks in the future.
Assembling in Engine
For the specific hero prop of the church, and since this is a cinematic scene, it utilizes three different instances of the vine mesh: the base wood vines, a smaller leaf inner layer, and larger leaf outer layer. I am running into an issue in Houdini with getting the materials connect with the appropriate group, or even seperate into two seperate materials (vines and leaves) so I created a parameter on the options tab as a temporary solution (Full Bush / Seperate Leaf & Bush)
Scene Assembly
All 3D models are taken from Fab or are a Megascans asset with some slight editing to the church to remove the vine spawning from the inside of the mesh. I also made sure to put some time into lighting the scene appropriately so that all details could be fully seen and appreciated
Foliage Master Material
I have to admit, this was not my initial idea; it was inspired by two of my mentees own personal projects - one made a master material for a small environment he was making to save time on making new materials for everything and the other has been doing a shader study on Breath of the Wild's grass - shoutout to both of them!
After digging through many AAA games, but most notably Wayfinder, I've noticed that many many studios use a small number of master materials to create all of their objects, instancing them with various parameters. I wanted to take a shot at this since I will be working with Regradable's Art Lead and 3D artists to develop further environment tools for them, including a procedural building generator to work with a modular kit.
In it's current state, this is very bare bones but allows for easy customization of foliage tools to the best of my ability. While I'm still working with the placeholder foliage I have the wind speeds set up on a Material Parameter Collection so they can be automatically updated as needed. However I do plan on updating this, or at least tweaking the formula as soon as I get further variations in.
Reference Board
For this project I knew I wanted to use this tool for Regradable (check out my other work for that here) which takes place in a futuristic dystopian city, which immediately took out the most fun option for scenery haha. As a result, I took inspiration from a buddy playing through Red Dead Redemption 2 and my favorite region, West Elizabeth, a region taking a lot of inspiration from Colorado, northern California, and the panhandle of Oklahoma
Better naming for parameters - i know what they mean, but test subjects (aka random people in the cohort) do not - that is a problem.
Material difference between vines and leaves
Add more variety of plants outside of daisys, spruce_tree_01, and a vine texture from google
Caden (UCF GaIM Alumni)
I don't think the lights inside should be flickering, it looks like a bug and is otherwise unnoticeable. I'd just remove it
The depth of field causes a great deal of issues with certain parts of the foliage that should be in the midground, but for whatever reason appear in the fore / background because of the blurring
your composition is good, but I think the actual model for the church is somewhat lacking. I can't put an exact finger on it, but it somehow seems out of place / noncontiguous with the rest of the environment. I blame the detail of the ivy - maybe some more grunge on the church?
I think that, while the scene doesn't appear static, I think it is missing some points of intrigue beyond just the church. Maybe some particle systems of bugs or god-rays could add some interest
Chandler (Cohort 22)
The ground texturing feels quite flat. It could be from the DOF but i think it could be pushed further regardless. If you're unwilling to push higher fidelity on the landscape mat (which is fair) then i'd up your foliage actors in general, the church is being overtaken by vegetation so it's make sense that the surrounding area is quite consumed by nature im thinking more of the context of the scene here




.png)


.png)


